Want to switch to a new Bybit account but already completed KYC on your old one?
No worries — Bybit allows users to transfer their verified identity (KYC) to another account once every 180 days.
In this guide, Backcom will show you how to securely transfer your KYC to another account, including the requirements, restrictions, and step-by-step instructions.


Why Transfer Your Bybit Identity?
Many users wish to move their verified KYC to a new account for reasons such as:
- Starting fresh with a new referral code (e.g. to earn cashback on fees via Backcom.io)
- Changing to a personal account from an institutional one
- Separating trading accounts for better management
- Closing an old account that no longer meets your needs
Bybit supports identity transfers — but only under certain conditions.
Requirements for KYC Transfer on Bybit
Before initiating the transfer, you must ensure:
- Your current account (source) is already verified (KYC Level 1 or above).
- You haven’t transferred your identity in the last 180 days.
- The target account (new) has no KYC completed yet.
- Both accounts will be temporarily restricted from fiat services and withdrawals for 24 hours after the transfer.
- Any existing funds on the old account must be withdrawn manually after the cooldown period.
- No active P2P orders, fiat deposits, or Bybit Card linked. You must cancel/remove them first.
- All positions must be closed before initiating the transfer.
- You will lose unclaimed bonuses or new user benefits on the new account.
- Only identity (name, date of birth, ID) is transferred — NOT phone, email, wallet, referrals, or history.
You can only transfer identity between personal accounts (individual KYC), not institutional accounts.
How to Transfer Your Identity to Another Bybit Account
On The Website
Follow these 7 steps:
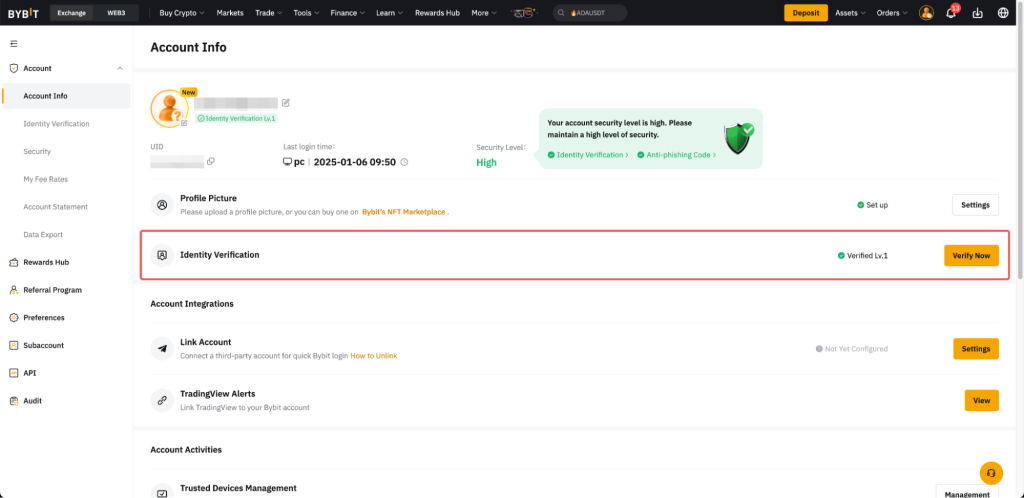
Step 1: Log into your verified account
Go to Profile → Identity Verification on the Bybit website or app.
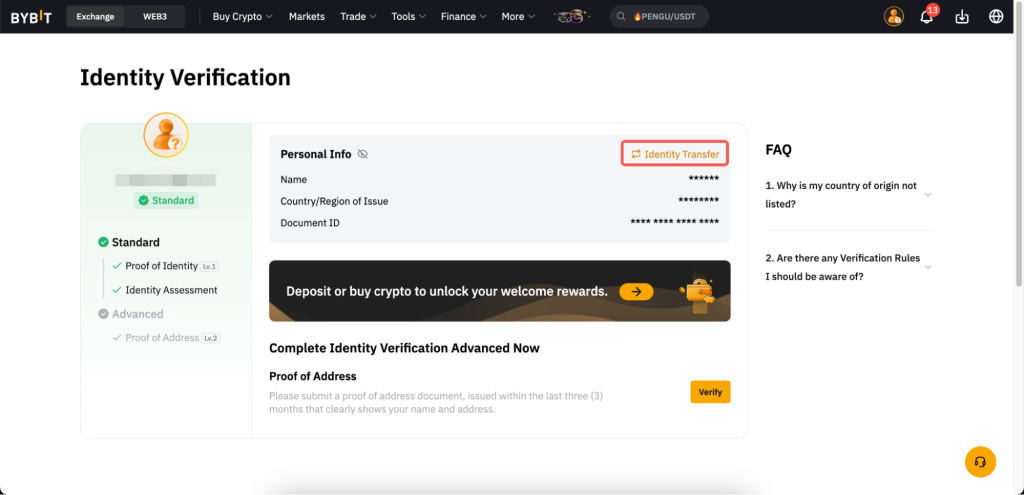
Step 2: Click on “Identity Transfer”
You’ll see this option below your KYC status. Select it to begin the process.
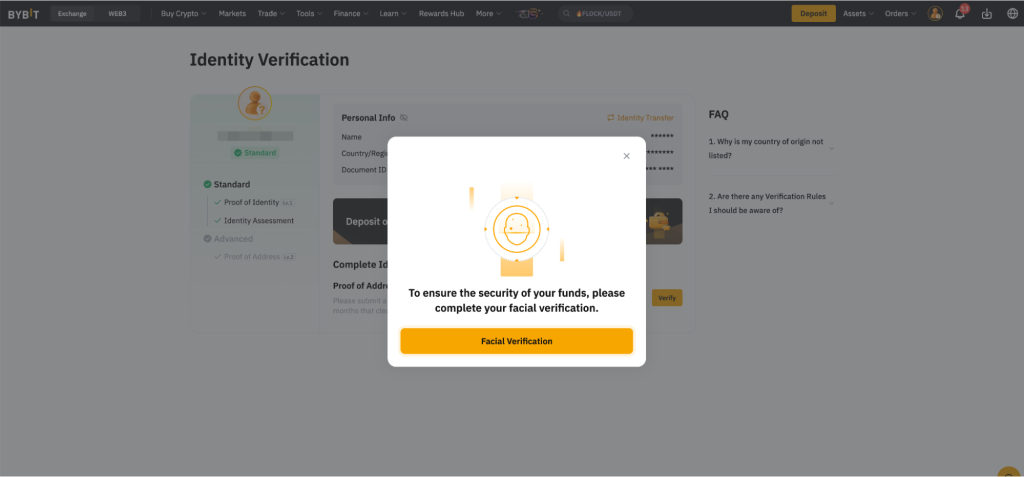
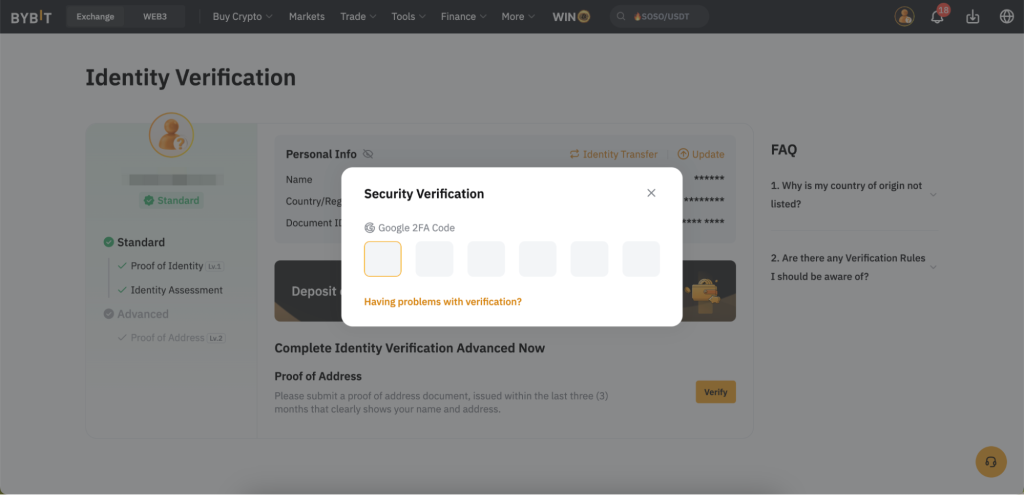
Step 3: Confirm security verification
Bybit will ask for facial recognition or your standard 2FA method to proceed.
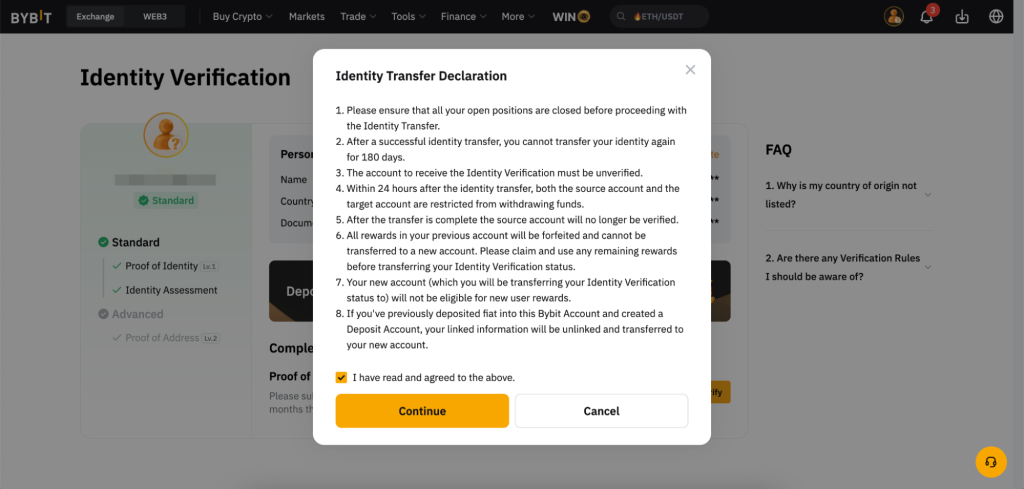
Step 4: Accept terms and conditions
Read the pop-up carefully and confirm you understand the consequences of this one-time action.
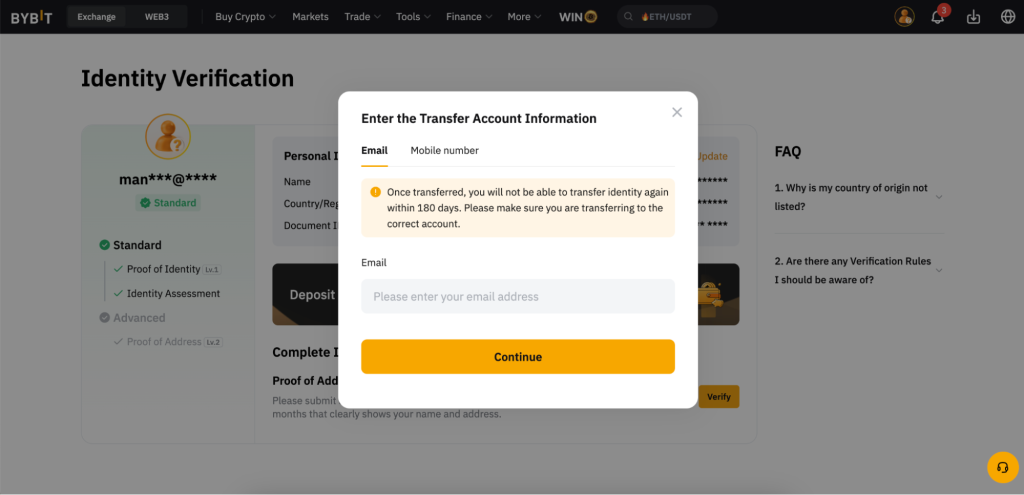
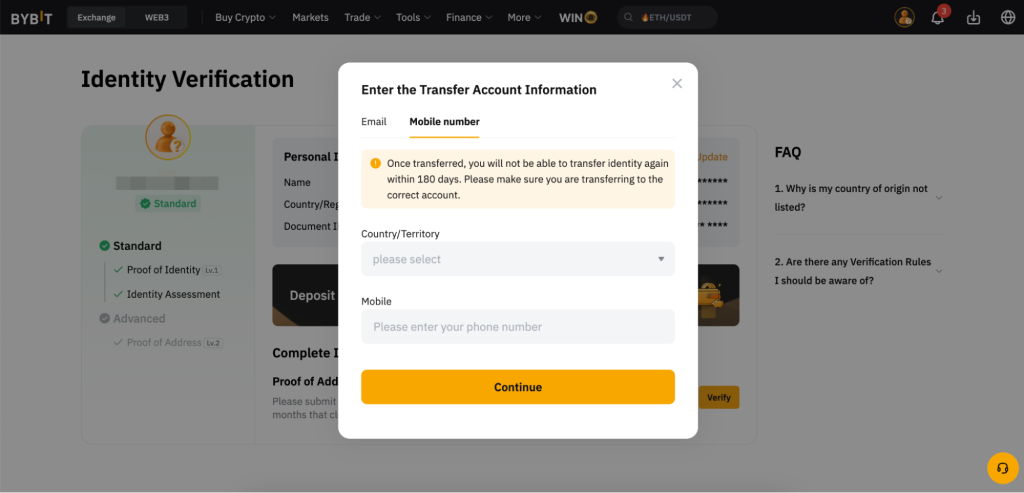
Step 5: Enter the new account’s email or phone number
This is the account where you want to move your identity. Make sure it’s correct and unused for KYC.
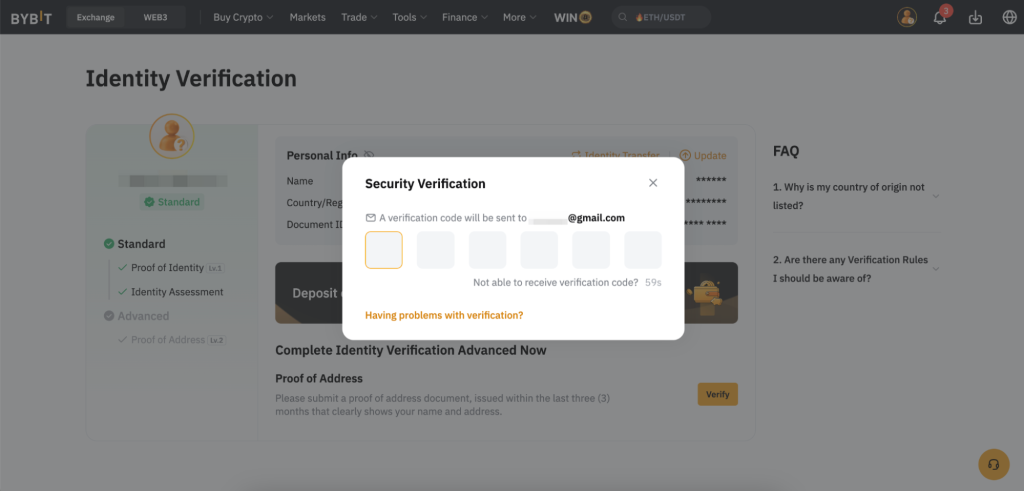
Step 6: Complete security verification on the target account
A code will be sent to the new account’s email or phone. Enter the code + Google Authenticator if enabled.
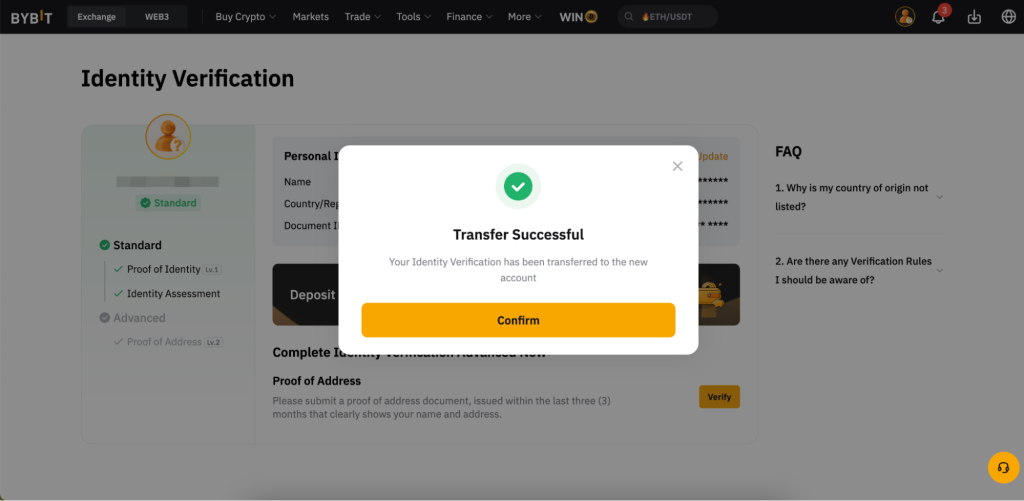
Step 7: Done!
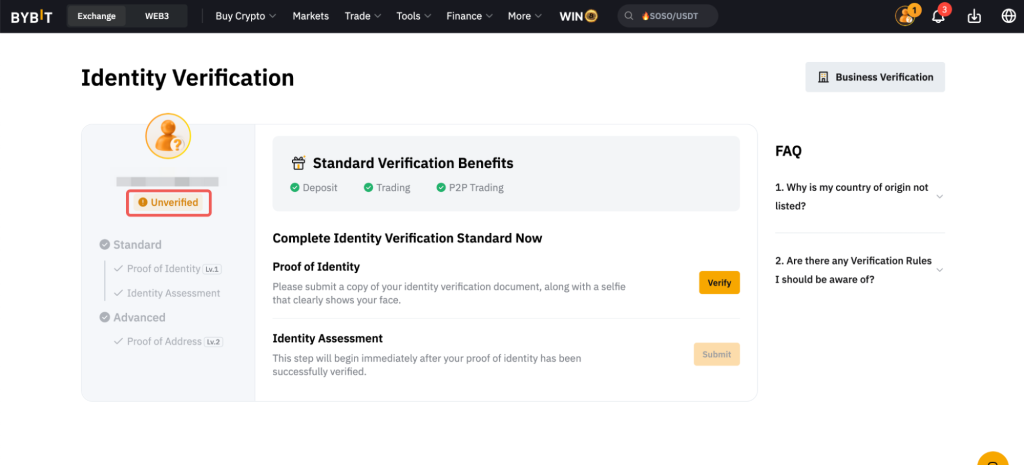
Your identity will now be transferred. The old account will return to “Unverified” status, and the new one becomes verified.
On The App
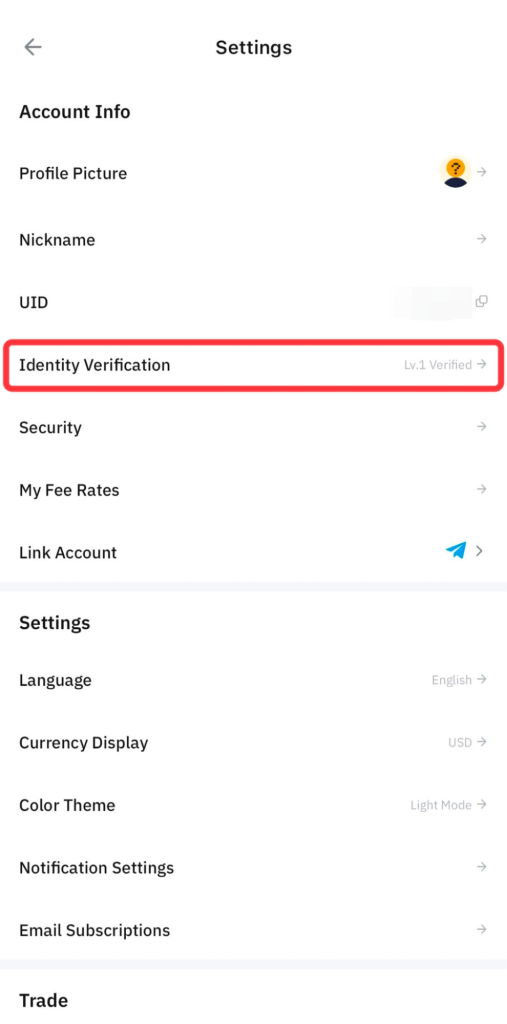
Step 1: Go to Profile → Identity Verification
Open the Bybit app and tap on the Profile icon at the top left corner.
From the menu, select Identity Verification to access your KYC settings.
Step 2: Tap on “Identity Transfer”
On the Identity Verification screen, tap the Identity Transfer button located below your current KYC status.
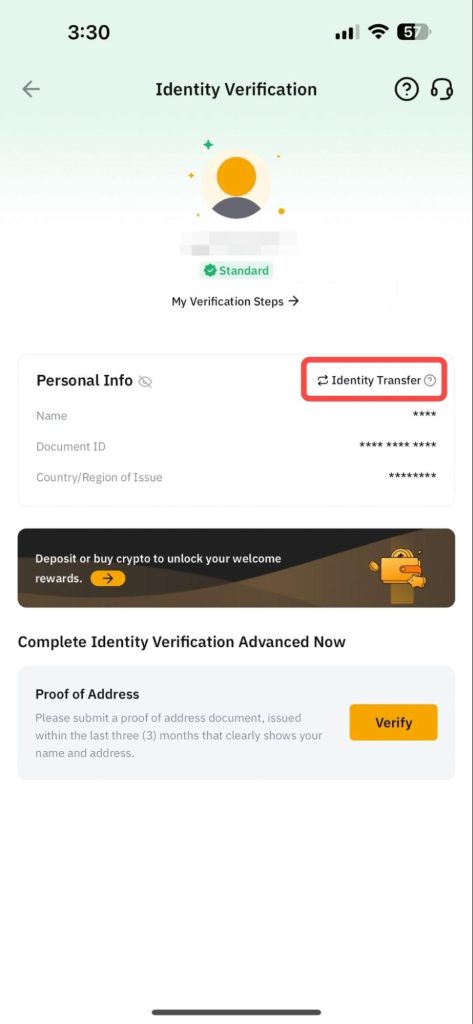
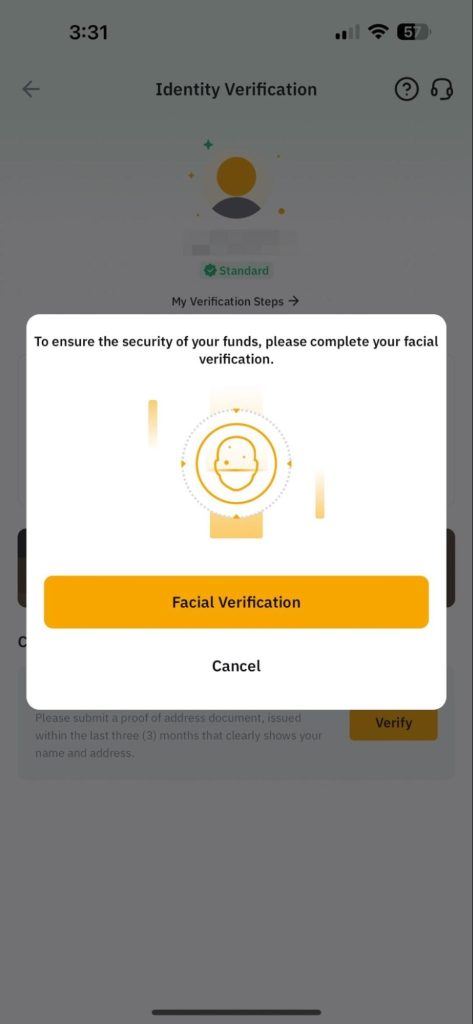
Step 3: Complete Security Verification on Your Current Account
To protect your account and assets, Bybit will prompt you to complete a security verification — this may include facial recognition or entering a 2FA code.
Follow the on-screen instructions carefully.
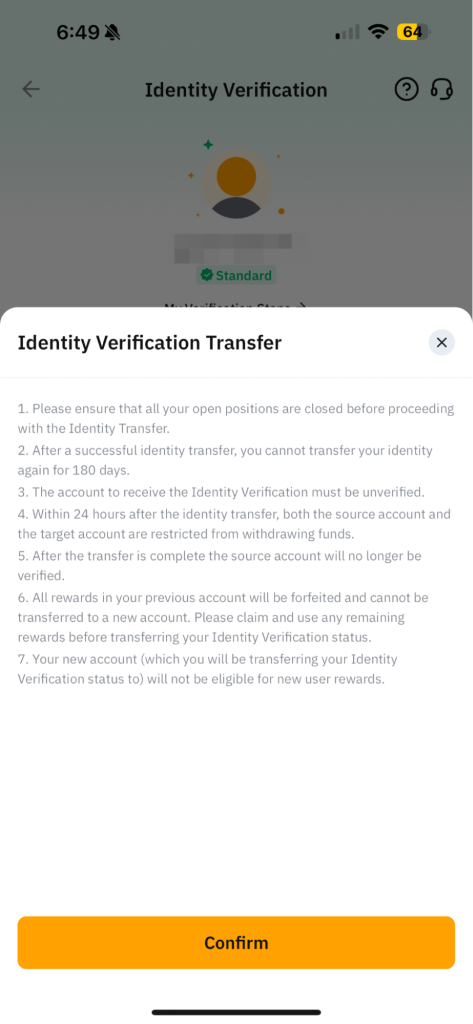
Step 4: Accept Terms and Conditions
A pop-up will appear with the Terms and Conditions for the identity transfer.
Review them, then tap Continue to proceed.
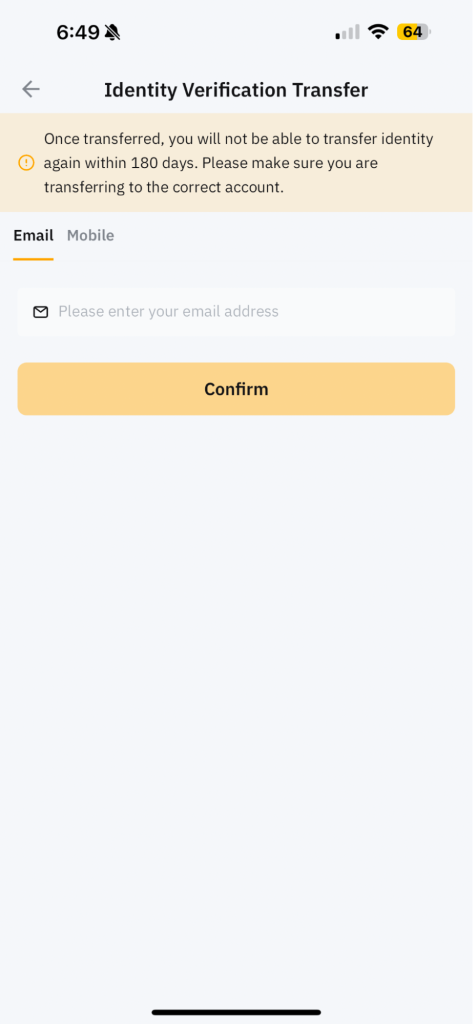
Step 5: Enter Target Account Information
Input the registered email address or mobile number of the target account where you want to transfer your identity.
Ensure that this account has not completed KYC yet.
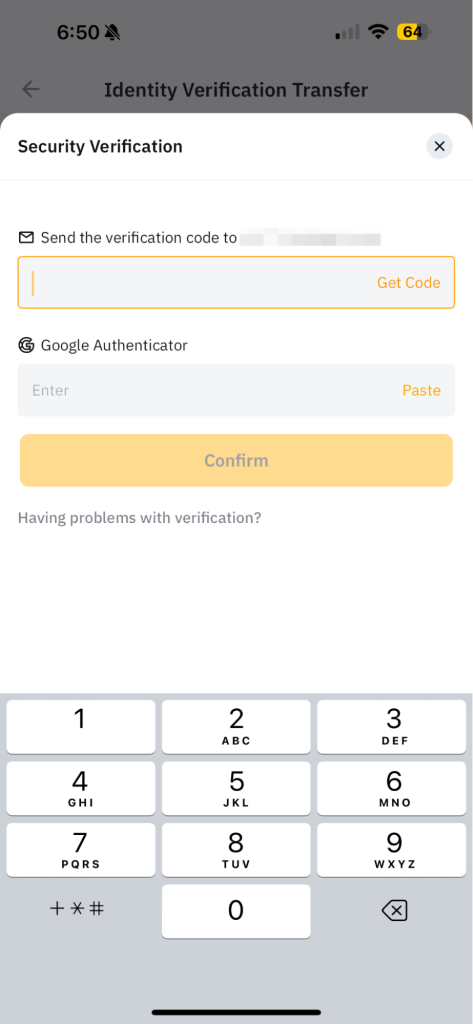
Step 6: Verify the Target Account
Bybit will send a verification code via email or SMS to the target account.
You’ll also need to enter the Google Authenticator code for the target account (if 2FA is enabled).
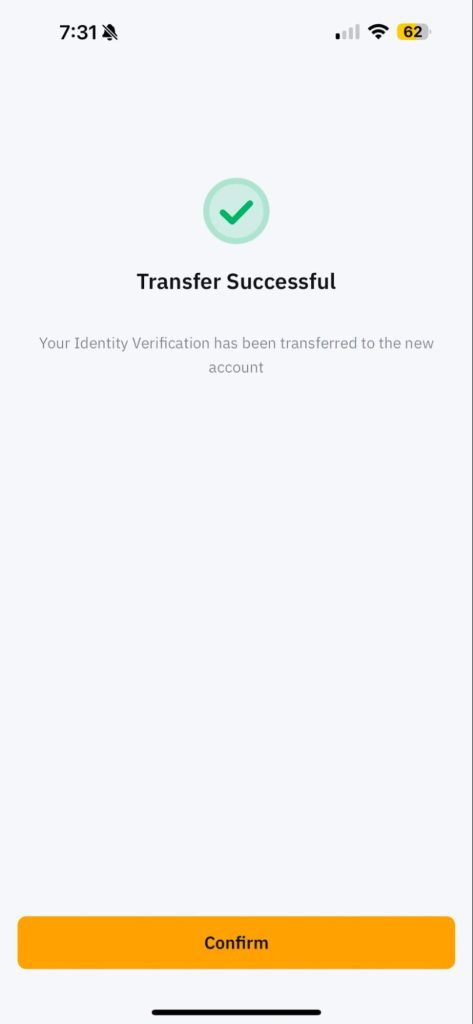
Step 7: Transfer Complete
Once all verifications are successful, your identity will be transferred to the new account.
Your original account will revert to an unverified status.
Backcom Pro Tips
- Want to earn up to 60% trading fee cashback on your new Bybit account?
➤ Use Backcom’s referral link when registering, or transfer KYC to an account connected to Backcom. - After transferring, wait 24 hours before making any withdrawal or fiat transactions.
- If you still have funds in the old account, use internal transfer or withdraw externally after restrictions are lifted.
- Bonus tip: Always double-check your target account’s info. This transfer cannot be undone.
FAQs
Can I transfer my Bybit KYC more than once?
Only once every 180 days.
Will my assets be transferred too?
No. Only identity info moves — assets stay in your old account.
Can I use the same phone number or email on both accounts?
No. You must use a different email/phone for each account.
What happens to referral rewards or bonuses?
Unclaimed bonuses will be lost. Claimed ones remain on the old account.
What if I’ve deleted my old account?
Contact Bybit Support to request manual assistance.
Conclusion
Transferring your identity to another Bybit account is simple, secure, and useful — especially if you want to link your account to platforms like Backcom to unlock high cashback rates on trading fees.


